.NET Core Barcode
What is .Net Core?
.NET Core is a .NET framework subset developed by Microsoft that is cross-platform and open source. The core framework supports different platforms such as Windows, macOS and Linux. The full source code is available in GitHub using either the MIT or Apache 2 licenses.What is .Net Core Barcode?
.NET Core Barcode is a Portable Class Library (PCL) available in the ConnectCode Barcode Fonts package that generates barcodes that meet the strictest requirements of the auto-id industry. It is a cross-platform Portable Class Library that supports Windows, macOS and Linux, and can be used in device, cloud, and embedded/IoT scenarios.As a barcode font raster to the output device and are not limited to DPI (Dots per Inch) of the computer screen, a barcode generated using fonts is of the highest quality and can meet the strictest requirements required by the auto-id industry.
Using .NET Core Barcode in Windows
Prerequisite- ConnectCode Barcode and Fonts package is installed
- .NET Core Barcode PCL v1.0 (.NET Core 2.0)
Please use Visual Studio 2015 Update 3 and Tools. - .NET Core Barcode PCL v1.1 (.NET Core 3.0)
Please use Visual Studio 2019 16.3 (or onwards).
1. Launch Visual Studio and go to "File->New Project" to create a new project.
2. Select "Visual C#->Windows->Universal->Blank App (Universal Windows)". You can also choose to create a Visual Basic or Visual C++ application. The Classic Desktop or ASP.NET Core Web application is also supported by the .NET Core Barcode PCL.
3. With the default values, click on the "OK" button and wait for the project to be created.
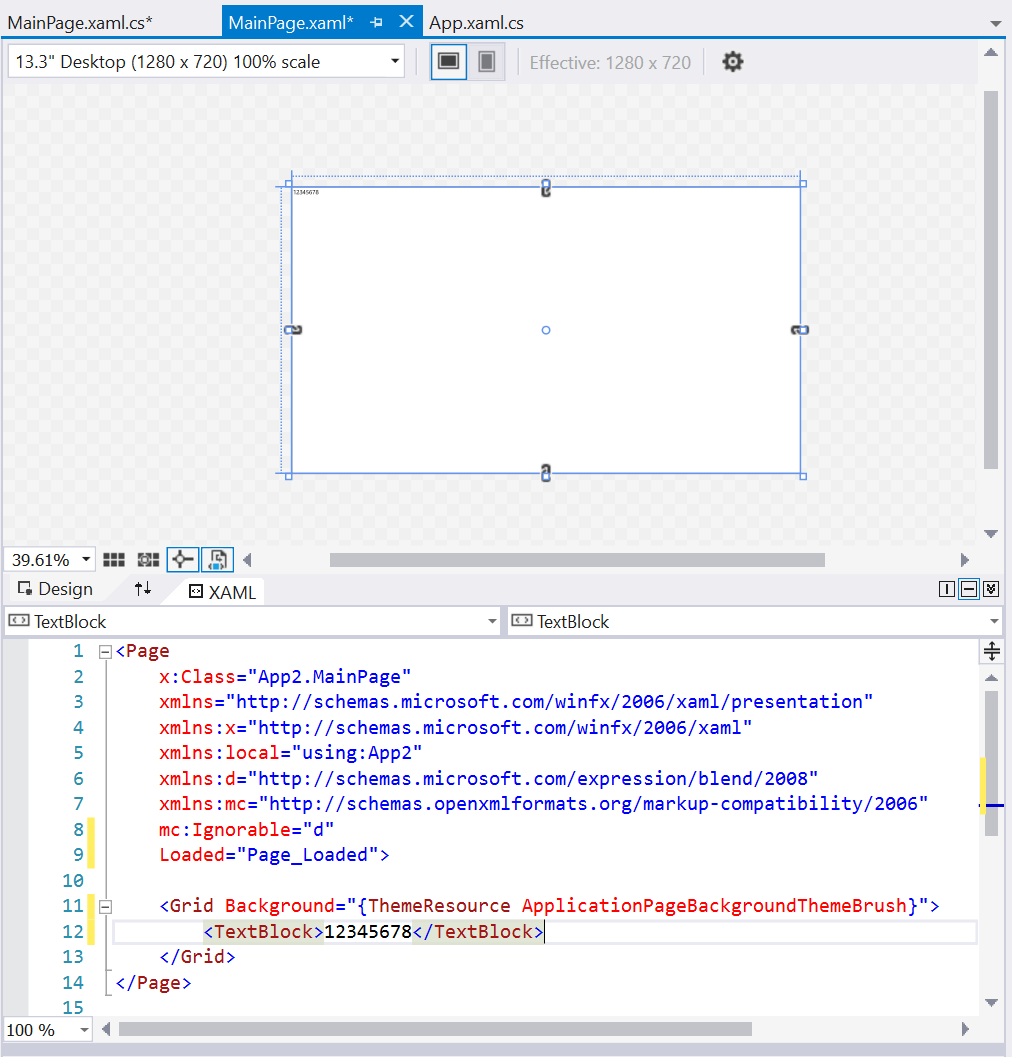
4. Double click on "MainPage.xaml" in the Solution Explorer. Set the Design preview to "13.3 Desktop (1280x720) 100% scale" and "Landscape". This is to allow you to better preview the generated barcode.

5. Add a TextBlock in the Grid as shown in the screenshot above and then change it to match the text below:
       <TextBlock x:Name="Data"
       FontFamily="/Fonts/ConnectCode128_S3_Trial.ttf#CCode128_S3_Trial"
       FontSize="32">12345678</TextBlock>
The TextBlock uses the Code 128 barcode font available in the ConnectCode Barcode Fonts package. The part up to the ".ttf" is the full path name while the "CCode123_S3_Trial" is the font name. In Windows, you can double click on a ".ttf" file to see the font name. We have also set the FontSize to 32 so that the barcode is large enough to be easily scanned when printed. The "12345678" is the input data for the barcode. In the Page_Loaded function below, we will read in this data and then use the NET Core Barcode PCL to encode it (generate barcode characters). Basically to create a barcode, you will simply need to encode the input data and then apply the specific barcode font.
6. Add the Page_Loaded function
Loaded="Page_Loaded"
in the Page attributes.
7. Next, add the .NET Core Barcode DLL. You can do this by right cliking on "References" in the Solution Explorer and selecting "Add Reference".
8. Click on the "Browse" tab followed by the "Browse" button. Select the "NETCodeBarcode.dll" that you have downloaded previously.
9. Next click on the MainPage.xaml.cs in the Solution Explorer. Change the Page_Loaded function to below:
      private void Page_Loaded(object sender, RoutedEventArgs e)
        {
            BarcodeFonts bcf = new BarcodeFonts();
            bcf.Data = Data.Text;
            bcf.BarcodeType = BarcodeFonts.BarcodeEnum.Code128Auto;
            bcf.encode();
            Data.Text = bcf.EncodedData;
        }
Remember to add the following using statement at the top of the class.
using Net.ConnectCode.Barcode;
This function instantiate the BarcodeFonts class and used it to encode the input data stored in the TextBlock. The generated output is placed back into the TextBlock. Notice that we have specified for a Code 128 Auto barcode to be generated.
10. Next we will need to add the barcode fonts required into this Visual Studio project. Right click on the project in Solution Explorer, select "Add->New Folder" and name the folder as "Fonts".
11. Right click on the "Fonts" folder and select "Add->Existing Item". Navigate to the following folder:
C:\Program Files (x86)\ConnectCodeTrial (or C:\Program Files (x86)\ConnectCode if you are using the registered version)
Finally select the ConnectCode128_S3_Trial.ttf (or ConnectCode128_S3.ttf if you are using the registered version of the fonts package) font.
Note - If you are using the msix installer with the Windows 11 Barcode Fonts Encoder, you can go to the "Setup Barcode Fonts" section in the Encoder to export the True Type fonts.
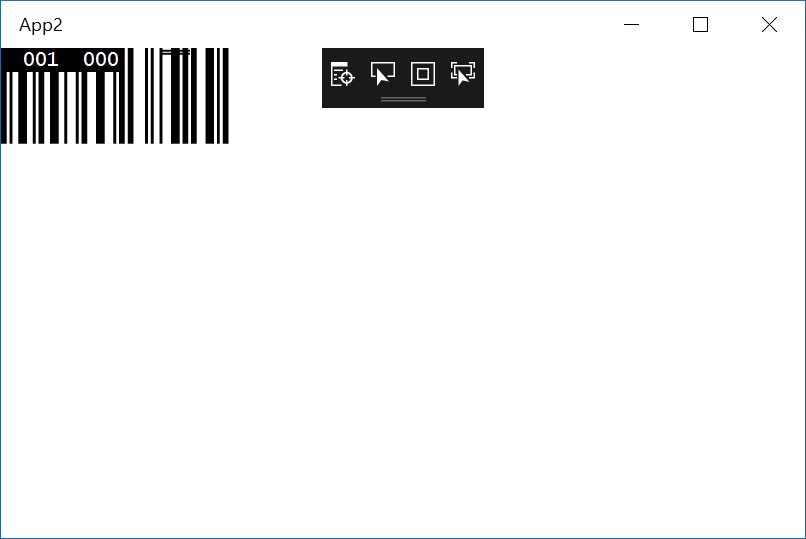
11. We are now ready to run the application to see the barcode we have created. Click on File menu->Debug-Start Debugging and you should see the App with the barcode below:

