Create DataMatrix in PowerBuilder with Fonts
This tutorial illustrates the use of a COM (Component Object Model) library and a barcode font available in ConnectCode DataMatrix package for creating DataMatrix barcode in PowerBuilder. The generated DataMatrix complies with the ISO/IEC 16022:2006 standards and can meet the strictest requirements of the Auto-ID industry.
Prerequisites
- PowerBuilder v12, PowerBuilder 2017, PowerBuilder 2019, or PowerBuilder 2021
- ConnectCode DataMatrix package is installed
Tutorial on creating a DataMatrix barcode in PowerBuilder
1. Launch a Windows Command Prompt as Administrator. In the Command Prompt, enter the following command to go to the DataMatrixCOMLibrary folder.
cd C:\Program Files (x86)\ConnectCodeDataMatrix\Resource\DataMatrixCOMLibrary
2. Next, use the Assembly Registration Tool (Regasm.exe) to register the DataMatrixCOMLibrary.dll assembly with COM.
Regasm DataMatrixCOMLibrary.dll /tlb:DataMatrixCOMLibrary.tlb /codebase
If Regasm is not available, you can verify if the following folder exists and add the folder into your PATH. The folder may be different depending on your version of .NET.
C:\Windows\Microsoft.NET\Framework\v4.0.30319\
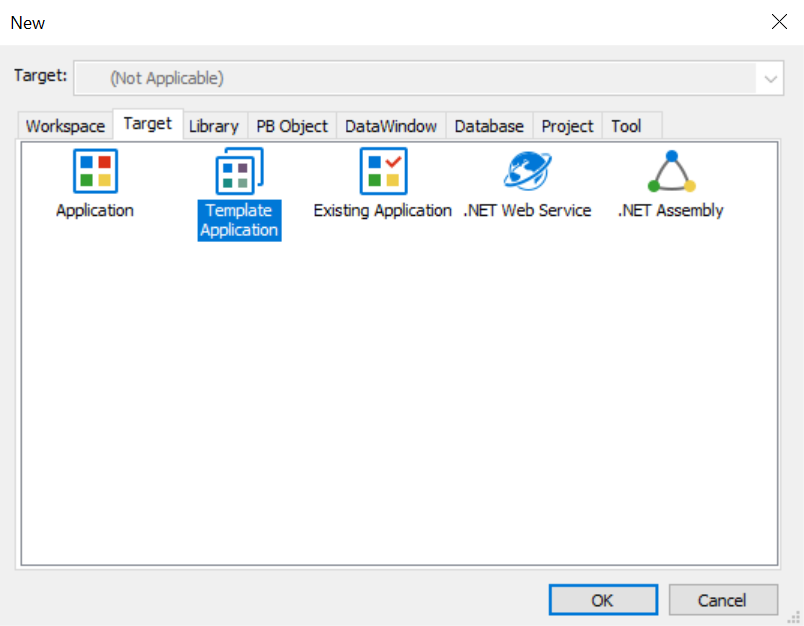
3. Launch PowerBuilder and create a new Template Application in the Target tab.
4. You can select “SDI application” as the "Application Type" and “None” in Connectivity Options” to create a sample application.
5. Click on w_genapp_main when the application is created. From the Menu select "Insert->Control->CommandButton" and rename the button to "DataMatrix". Next, insert a TextEdit control and layout the components as shown in the screenshot below.
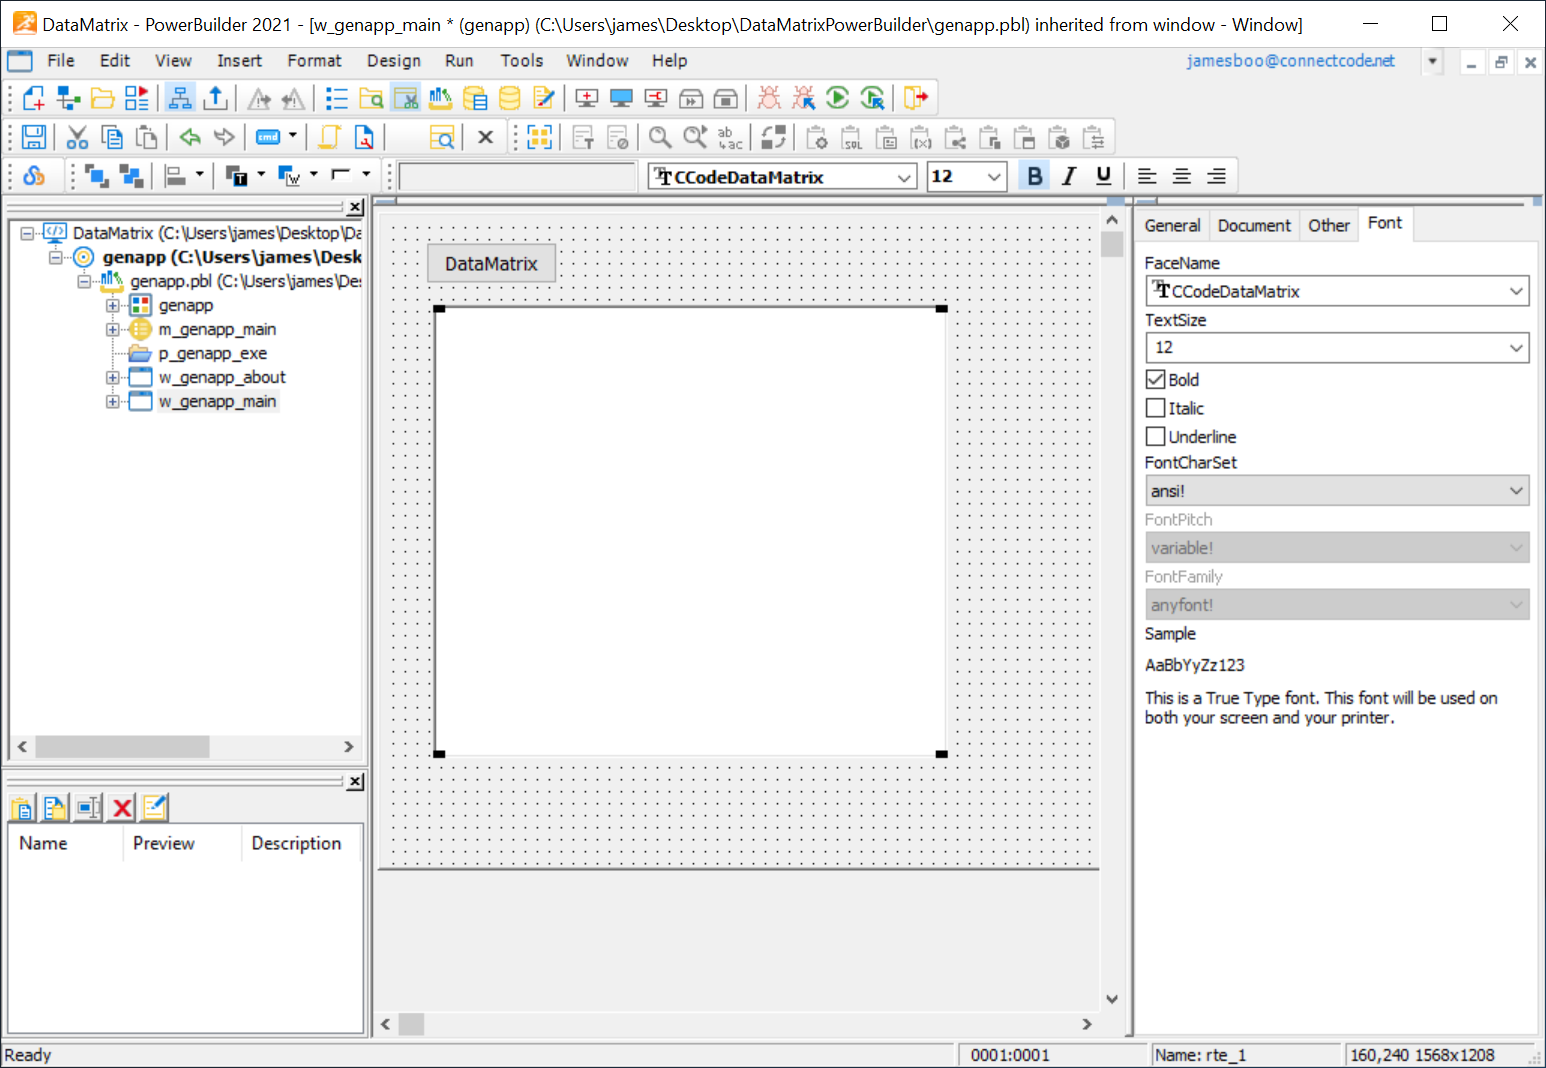
Select the TextEdit control, change the Font to CCodeDataMatrix (or CCodeDataMatrix_Trial) and the Font Size to 8 to fit the barcode nicely on the TextEdit control. The output generated by the DataMatrixCodeCOMLibrary will be placed in the TextEdit control and displayed as a barcode with the CCodeDataMatrix True Type font.
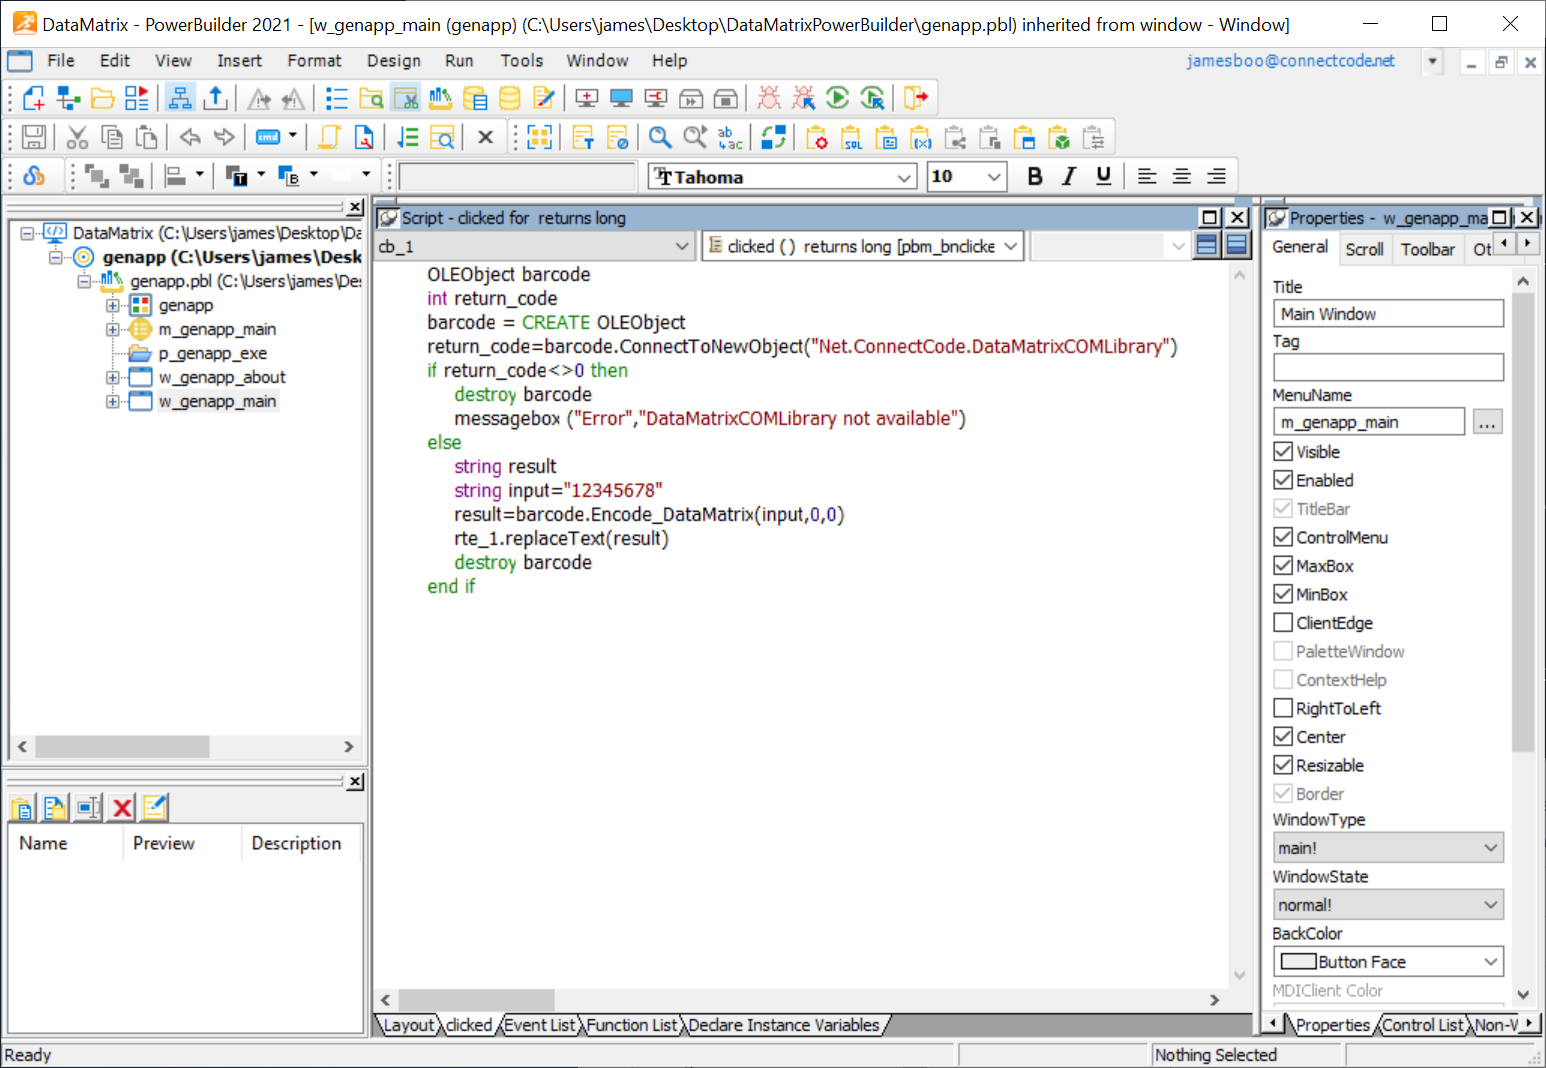
6. Next, double click on the button and add the following script:
	OLEObject barcode
	int return_code
	barcode = CREATE OLEObject
	return_code=barcode.ConnectToNewObject("Net.ConnectCode.DataMatrixCOMLibrary")
	if return_code<>0 then
		destroy barcode
		messagebox ("Error","DataMatrixCOMLibrary not available")
	else
		string result
		string input="12345678"
		result=barcode.Encode_DataMatrix(input,0,0)
		//2nd parameter: 0 - square, 1 - rectangle
		//3rd parameter: 0-None,1-FNC1,2-05 Macro,3-06 Macro,4-Reader Programming
		rte_1.replaceText(result)
		destroy barcode
	end if
In the source code above, an OLE object is created with the DataMatrixCOMLibrary. The "Encode_DataMatrix" method is used to generate the barcode.
Second Parameter: 0 - Square DataMatrix, 1 - Rectangle DataMatrix
Third Parameter: Prefix
0 - None
1 - FNC1 (GS1 FNC1 character)
2 - 05 Macro (Macro codeword 236)
3 - 06 Macro (Macro codeword 237)
4 - Reader Programming (Indicates the symbol encodes a message used to program the reader system)
7. Run the application by going to the menu and select “Run->Select and Run”. Click on the "DataMatrix" button and see that you get the DataMatrix barcode output in the TextEdit control. If you get an error message saying that "DataMatrixCOMLibrary is not available", check that you have carried step 2 successfully.
