Create Barcodes in WinUI using barcode fonts
What is WinUI?
Windows UI Library (WinUI) is a user experience framework that combines existing Win32 and UWP APIs for building modern Windows apps that can scale across devices. In WinUI 3, the APIs are decoupled from the Windows Operating System and shipped independently as part of Microsoft Project Reunion. By adopting WinUI, Win32 and UWP developers can share a common API for developing User Interfaces and publishing apps to the Microsoft Store.
What is WinUIBarcode?
WinUIBarcode is a WinUI 3 class library, and together with ConnectCode's barcode fonts, developers can create standards-compliant barcodes that meet the strictest requirements required by the industry. The class library performs the tasks of validating input data, generating check digits, and adding necessary start/stop characters. Using barcode fonts to create barcodes has many advantages, one of them is the ability to create quality-consistent barcodes across a wide variety of platforms such as Windows, iOS, Mac, Android, Web, Reporting Tools, Adobe graphics suite, and Microsoft Office (Excel and Word). This is useful to organizations on heterogeneous technology platforms who value the reliability of consistent barcodes for tracking of their stocks and products. Moreover, when a barcode - created with fonts - is printed, it rasters to the DPI of the printer, resulting in a barcode of highest quality that is not limited to the DPI of the screen.
WinUIBarcode is part of ConnectCode Barcode Software and Fonts, the market leader and most recognizable brand in the industry for barcode fonts and software.
Components of WinUIBarcode
- WinUIBarcode.dll for C# Desktop project (Available Now)
- WinUIBarcode.dll for C# UWP project (Coming Soon)
- WinUIBarcodeRuntimeComponent - C++ Desktop and UWP (Coming Soon)
How to create Standards-Compliant Barcodes in WinUI with barcode fonts?
In this project, we are going to use WinUIBarcode and barcode fonts to create EAN13 and Code 128 barcodes.
Prerequisite
- ConnectCode Barcode and Fonts package is installed
- Visual Studio 2019 16.9 (or onwards)
- WinUI 3.0 (Project Reunion 0.5 or onwards)
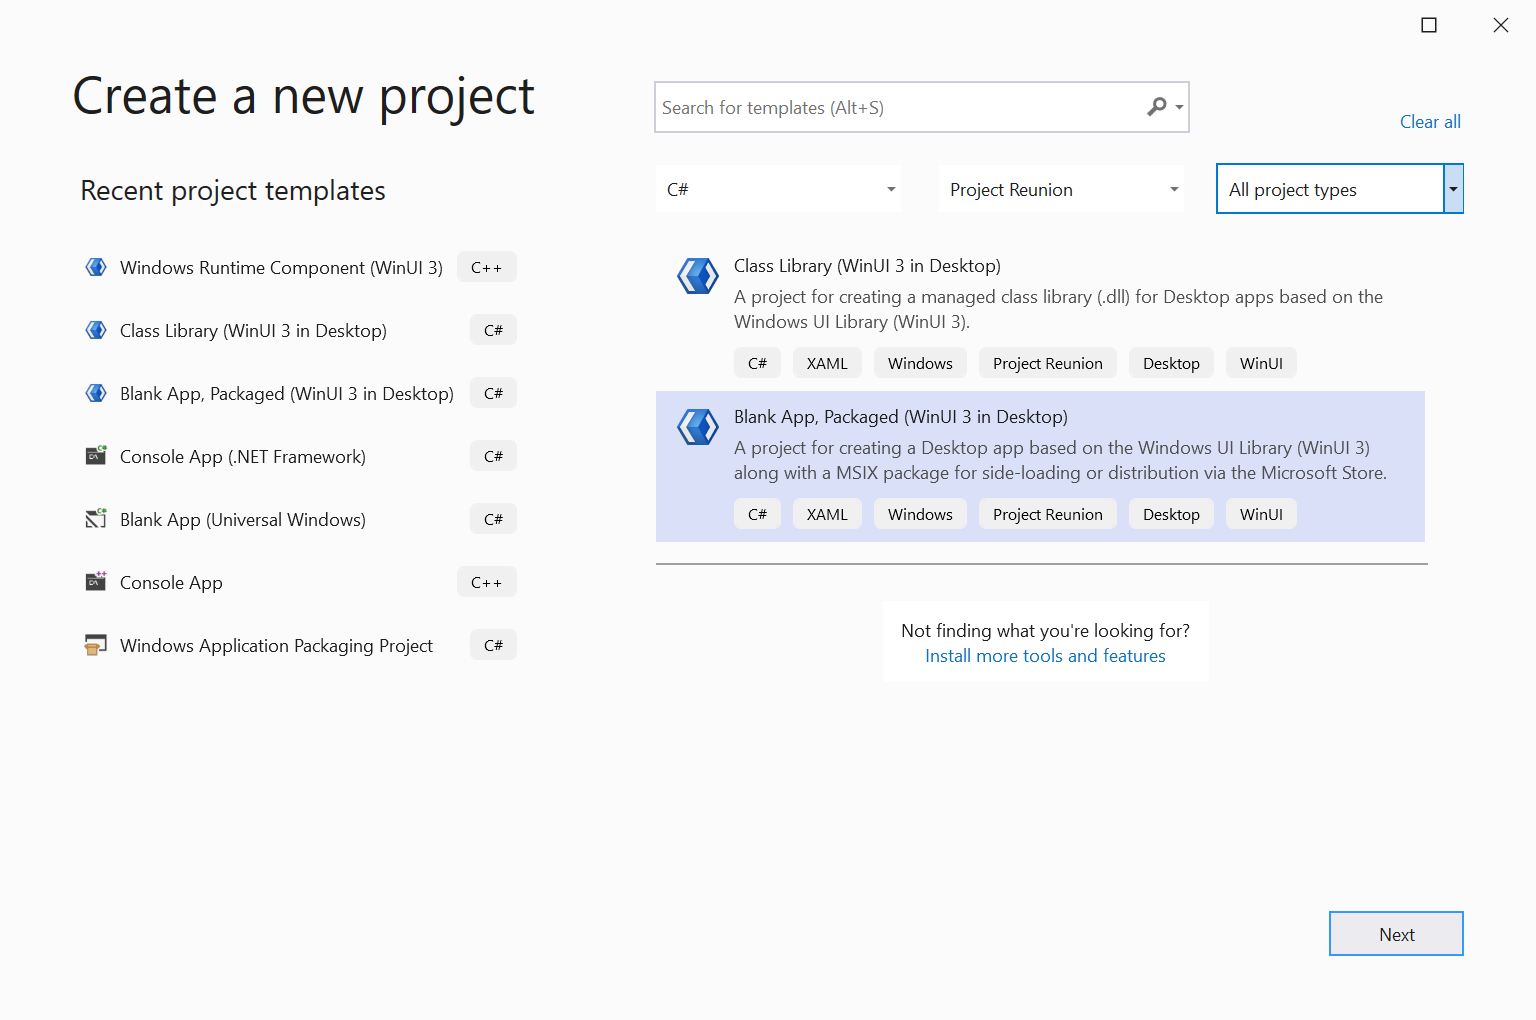
1. Launch Visual Studio and create a new project. Select the "Blank App, Packaged (WinUI in Desktop)" C# template and click on the Next button.
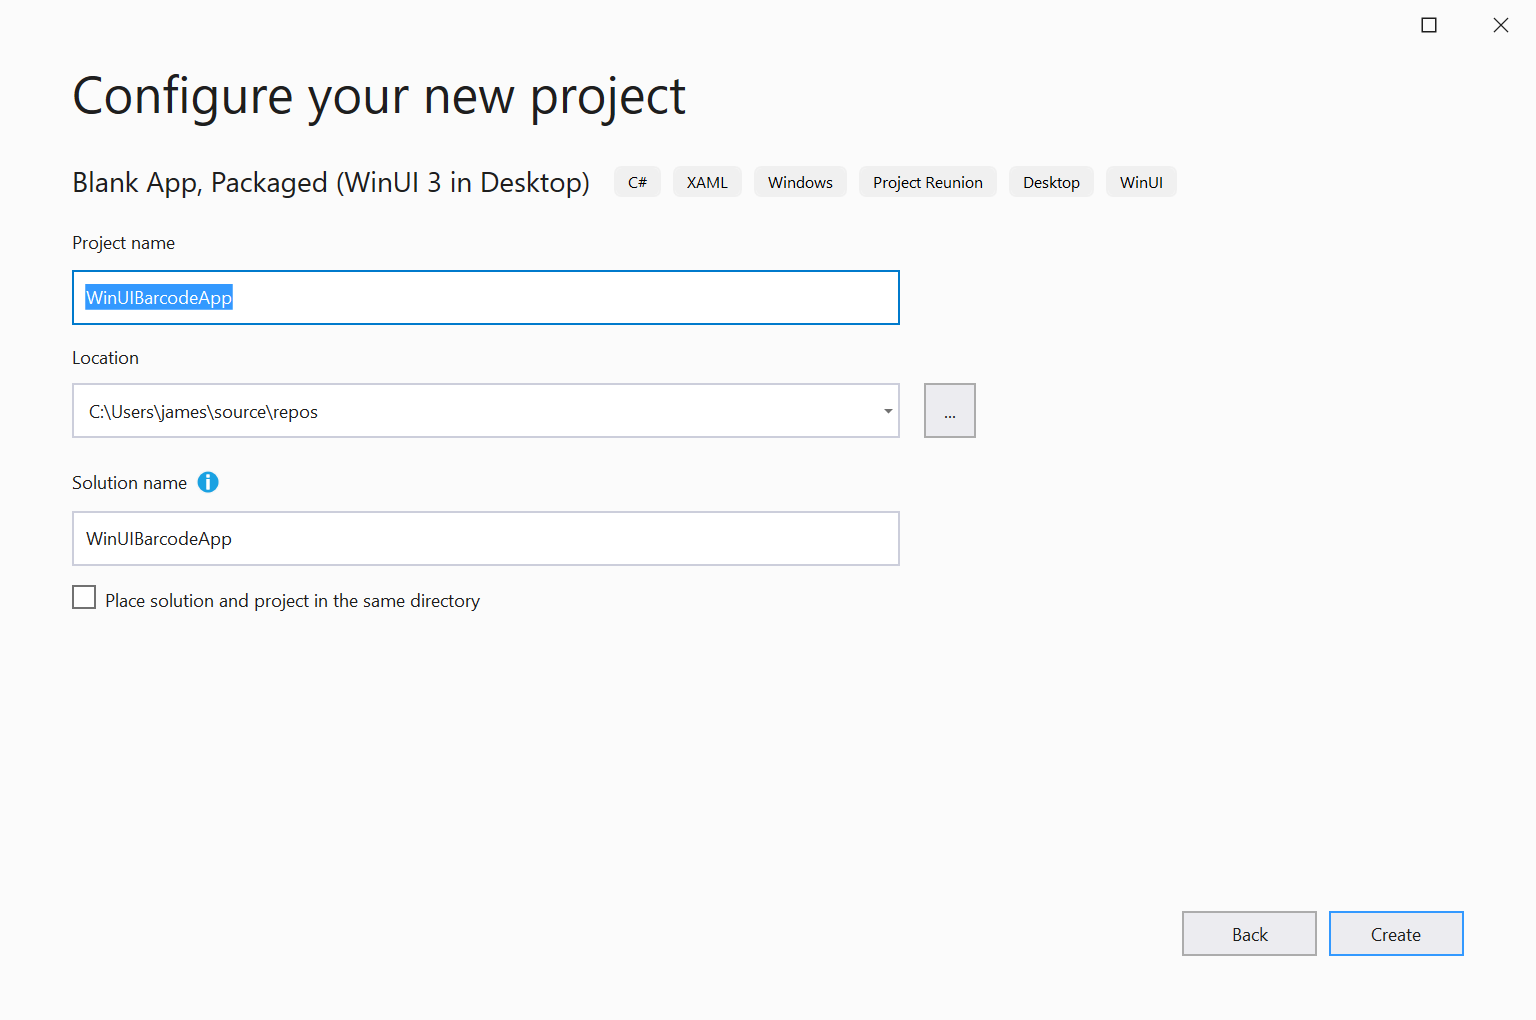
2. In the Configure your new project dialog, enter "WinUIBarcodeApp" as the Project name, leave everything else as the default values, and click on the Create button to create the project. You will be prompted to select the target and minimum platform version where you can simply use the default values. A Visual Studio solution containing WinUIBarcodeApp and WinUIBarcodeApp (Package) projects are created for you, as illustrated in the screenshot below:
If you are using .NET SDK 5.0.203 or earlier, you will need to add SDK Framework references in the WinUIBarcodeApp project file. Right-click on WinUIBarcodeApp project in Solution Explorer and select Edit Project File. Add the following lines into <ItemGrroup>
<ItemGrroup>
    <FrameworkReference Update="Microsoft.Windows.SDK.NET.Ref" RuntimeFrameworkVersion="10.0.18362.16" />
    <FrameworkReference Update="Microsoft.Windows.SDK.NET.Ref" TargetingPackVersion="10.0.18362.16" />
.
.
.
</ItemGroup>
If you are using .NET SDK 5.0.204 or later versions, the above is not required.
3. To create a standards-compliant barcode we first need to encode the input data. The WinUIBarcode.dll is used for this encoding purpose. To add WinUIBarcode.DLL to the WinUIBarcodeApp project, right-click on Dependencies in WinUIBarcodeApp and select the Add Project Reference option. In Reference Manager, click on the Browse button and navigate to <ConnectCode Folder>\Resource\WinUI\Desktop folder. Select WinUIBarcode.dll, and click on the OK button. You will see WinUIBarcode added into Dependencies->Assemblies in Solution Explorer as shown below.
Note - If you are using the msix style installer for Windows 11, the "WinUI\Desktop" folder is in the "Resouce.zip" file.
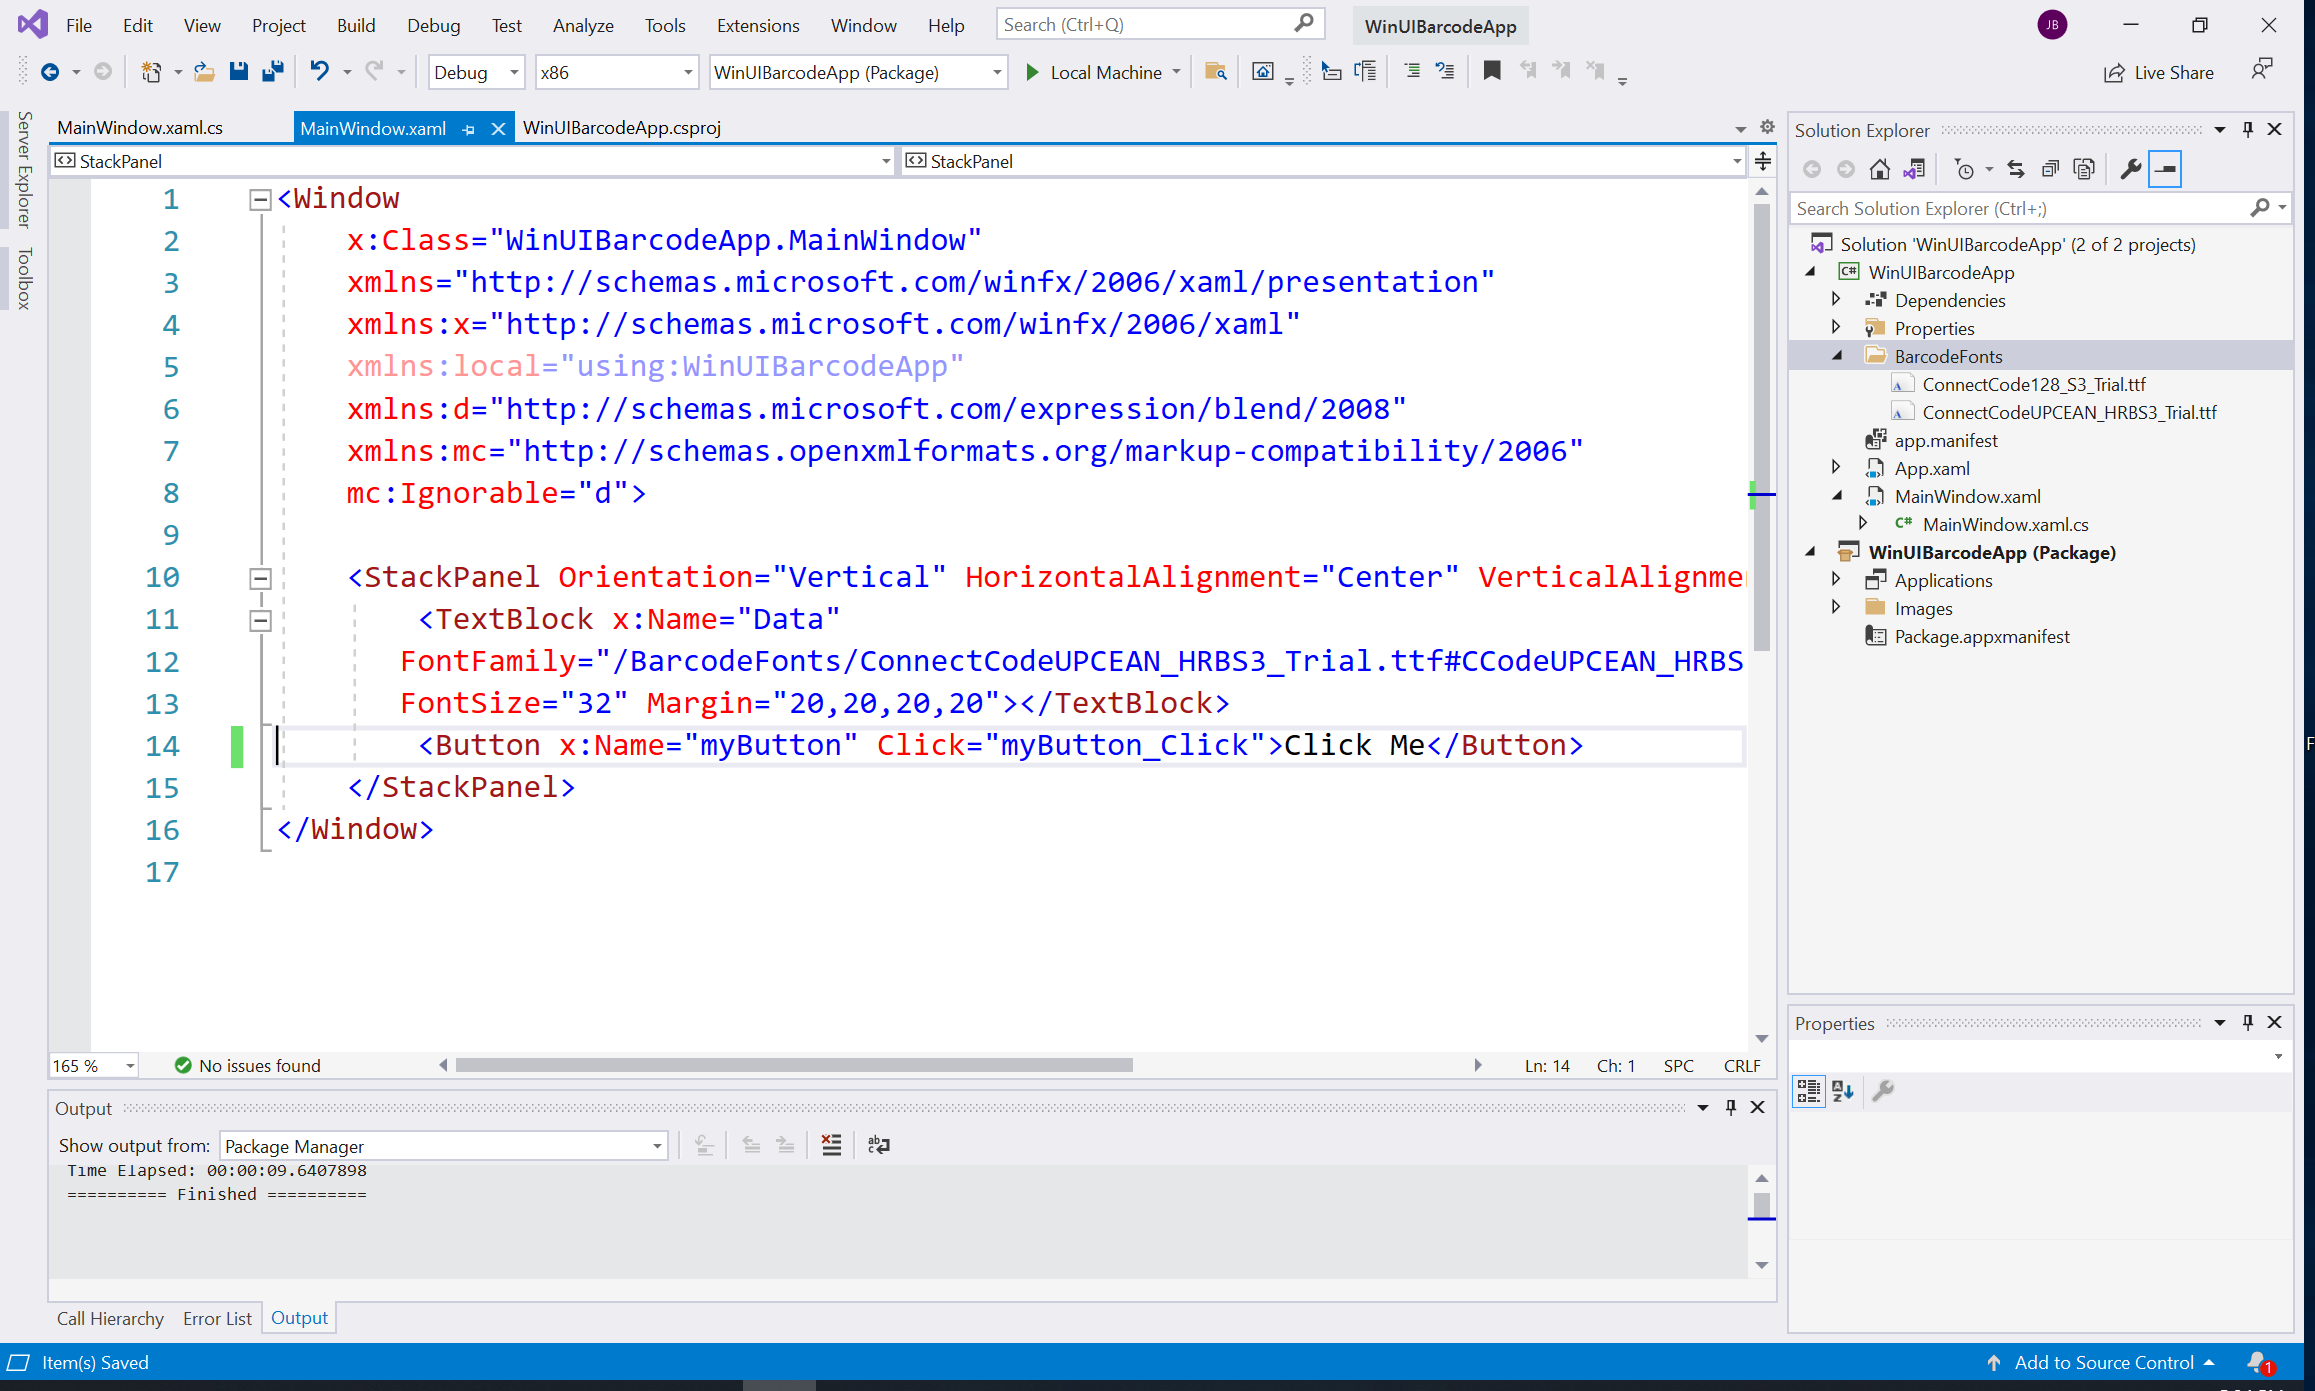
4. Next, add barcode fonts into the WinUIBarcodeApp Visual Studio project. First, right-click on WinUIBarcodeApp project in Solution Explorer, select Add -> New Folder, and name the folder as "BarcodeFonts". Next, right-click on "BarcodeFonts" folder, select Add->Existing Item and navigate to the following folder:
C:\Program Files (x86)\ConnectCode

(or C:\Program Files (x86)\ConnectCodeTrial if you are using the Trial version)
Finally, select the following barcode fonts:
- ConnectCodeUPCEAN_HRBS3.ttf (or ConnectCodeUPCEAN_HRBS3_Trial.ttf) - For UPC and EAN barcodes
- ConnectCode128_S3.ttf (or ConnectCode128_S3_Trial.ttf) - For Code 128 barcode
The name of the fonts shows information on the type of barcode. In the above, we are going to use fonts to create EAN13 and Code 128 barcodes. Each type of barcode also comes with several barcode fonts of varying heights. The "S3" in the name ConnectCodeUPCEAN_HRBS3.ttf refers to the height and you can think of "S4" as a font with a taller height than "S3". You can set the size of a barcode by choosing a barcode font and setting the font size. We provide more than 100 barcode fonts, proven in the industry for over 15 years, of all commonly used 1D barcodes in the package. We also provide comprehensive documentation on the usage of these barcode fonts in the Help file of the package.
Note: The Trial consists of a good sample of fonts across types of barcodes. The Trial fonts come with horizontal markings that do not affect scanning, though the barcodes with the trial markings are not what you can deploy to the production.
5. We have now added the encoding library and the necessary barcode fonts. As we have highlighted, we are going to create two different barcodes. Specifically, they are EAN13 (Extended Style) and Code 128 (B Subset). First, let us create EAN13 barcode. Click on MainPage.xaml in Solution Explorer and change the XAML to the following:
    <StackPanel Orientation="Vertical" HorizontalAlignment="Center" VerticalAlignment="Center">
        <TextBlock x:Name="Data"
       FontFamily="/BarcodeFonts/ConnectCodeUPCEAN_HRBS3.ttf#CCodeUPCEAN_HRBS3"
       FontSize="32" Margin="20,20,20,20">
        <Button x:Name="myButton" Click="myButton_Click">Click Me
    </StackPanel>
Please use the following if you are using fonts from the Trial version.
    <StackPanel Orientation="Vertical" HorizontalAlignment="Center" VerticalAlignment="Center">
        <TextBlock x:Name="Data"
       FontFamily="/BarcodeFonts/ConnectCodeUPCEAN_HRBS3_Trial.ttf#CCodeUPCEAN_HRBS3_Trial"
       FontSize="32" Margin="20,20,20,20">
        <Button x:Name="myButton" Click="myButton_Click">Click Me
    </StackPanel>
The code above adds a TextBlock for displaying an EAN13 barcode by using the "ConnectCodeUPCEAN_HRBS3.ttf" font. "CCodeUPCEAN_HRBS3" refers to the name of the barcode font. Please note that the font name is different from font file name. More information on UPC/EAN barcode fonts are available at:
https://barcoderesource.com/upcean_barcodefont.html
6. We have added the code to display a barcode using a barcode font. Next, we need to encode the input data. Click on MainWindow.xaml.cs and add the following to top of the file.
using Net.ConnectCode.Barcode;
Locate the myButton_Click function and add the following to the function.
            BarcodeFonts bcf = new BarcodeFonts();
            bcf.Data = "12345678";
            bcf.BarcodeType = BarcodeFonts.BarcodeEnum.EAN13;
            bcf.Extended = BarcodeFonts.YesNoEnum.Yes;
            bcf.encode();
            Data.Text = bcf.EncodedData;
            myButton.Content = "Clicked";
The code above uses the WinUIBarcode.dll to generate an Extended Style EAN13 barcode. The generated output (after encoding) is placed into a TextBlock when the button is clicked.
7. Run the app in Visual Studio, click on "Click Me" button and see the generated EAN13 barcode as shown in the screenshot below:
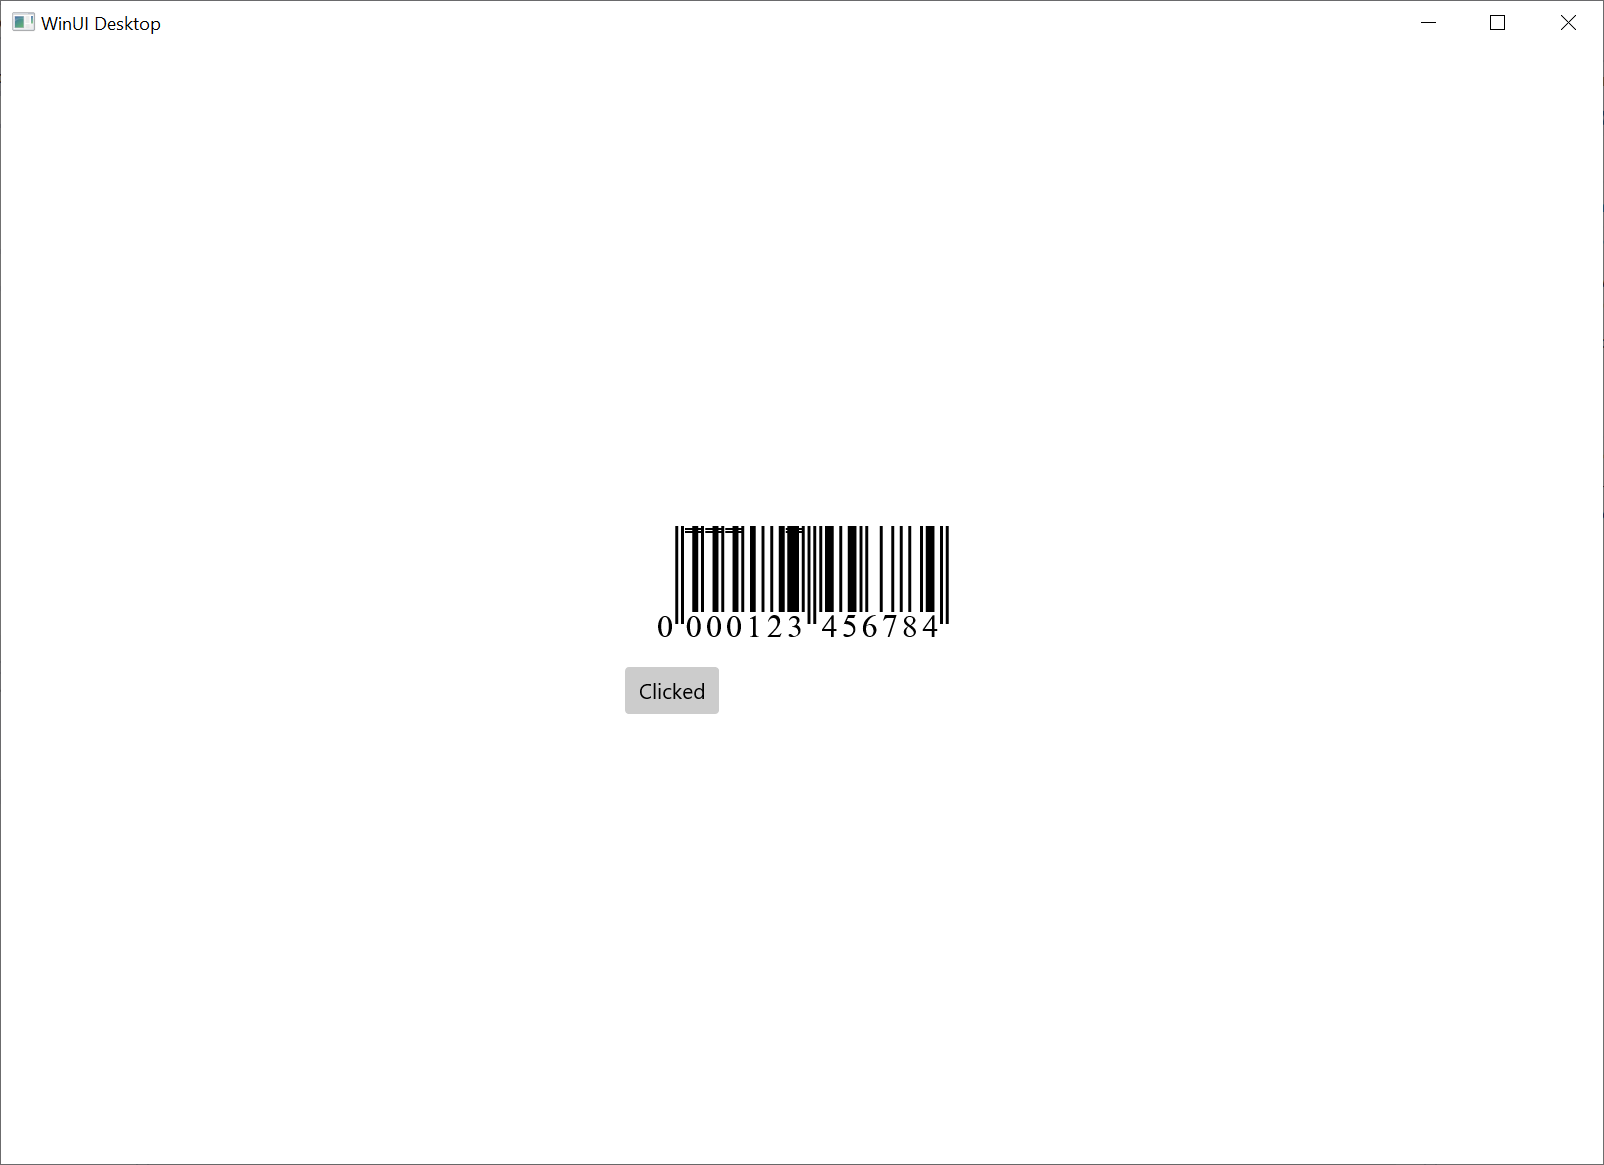
This barcode meets the strictest requirements of the auto-id industry.
8. Next, we add Code 128 B barcode. Change the code in MainWindow.xaml to the following:
    <StackPanel Orientation="Vertical" HorizontalAlignment="Center" VerticalAlignment="Center">
        <TextBlock x:Name="Data"
       FontFamily="/BarcodeFonts/ConnectCodeUPCEAN_HRBS3_Trial.ttf#CCodeUPCEAN_HRBS3_Trial"
       FontSize="32" Margin="20,20,20,20">
        <StackPanel Orientation="Vertical" HorizontalAlignment="Center" VerticalAlignment="Center">
            <TextBlock x:Name="Data128"
       FontFamily="/BarcodeFonts/ConnectCode128_S3_Trial.ttf#CCode128_S3_Trial"
       FontSize="32" Margin="20,20,20,0">
            <TextBlock x:Name="Text128" HorizontalAlignment="Center"
       FontSize="32" Margin="20,0,20,20">
        </StackPanel>
        <Button x:Name="myButton" Click="myButton_Click">Click Me
    </StackPanel>
and myButton_Click in MainWindow.xaml.cs to the following:
        private void myButton_Click(object sender, RoutedEventArgs e)
        {
            BarcodeFonts bcf = new BarcodeFonts();
            bcf.Data = "12345678";
            bcf.BarcodeType = BarcodeFonts.BarcodeEnum.EAN13;
            bcf.Extended = BarcodeFonts.YesNoEnum.Yes;
            bcf.encode();
            Data.Text = bcf.EncodedData;

            bcf.Data = "12345678";
            bcf.BarcodeType = BarcodeFonts.BarcodeEnum.Code128B;
            bcf.encode();
            Text128.Text = bcf.HumanText;
            Data128.Text = bcf.EncodedData;

            myButton.Content = "Clicked";
        }
More information on Code 128 barcode fonts are available at:
https://barcoderesource.com/code128_barcodefont.html
9. Run the program and to see the following.
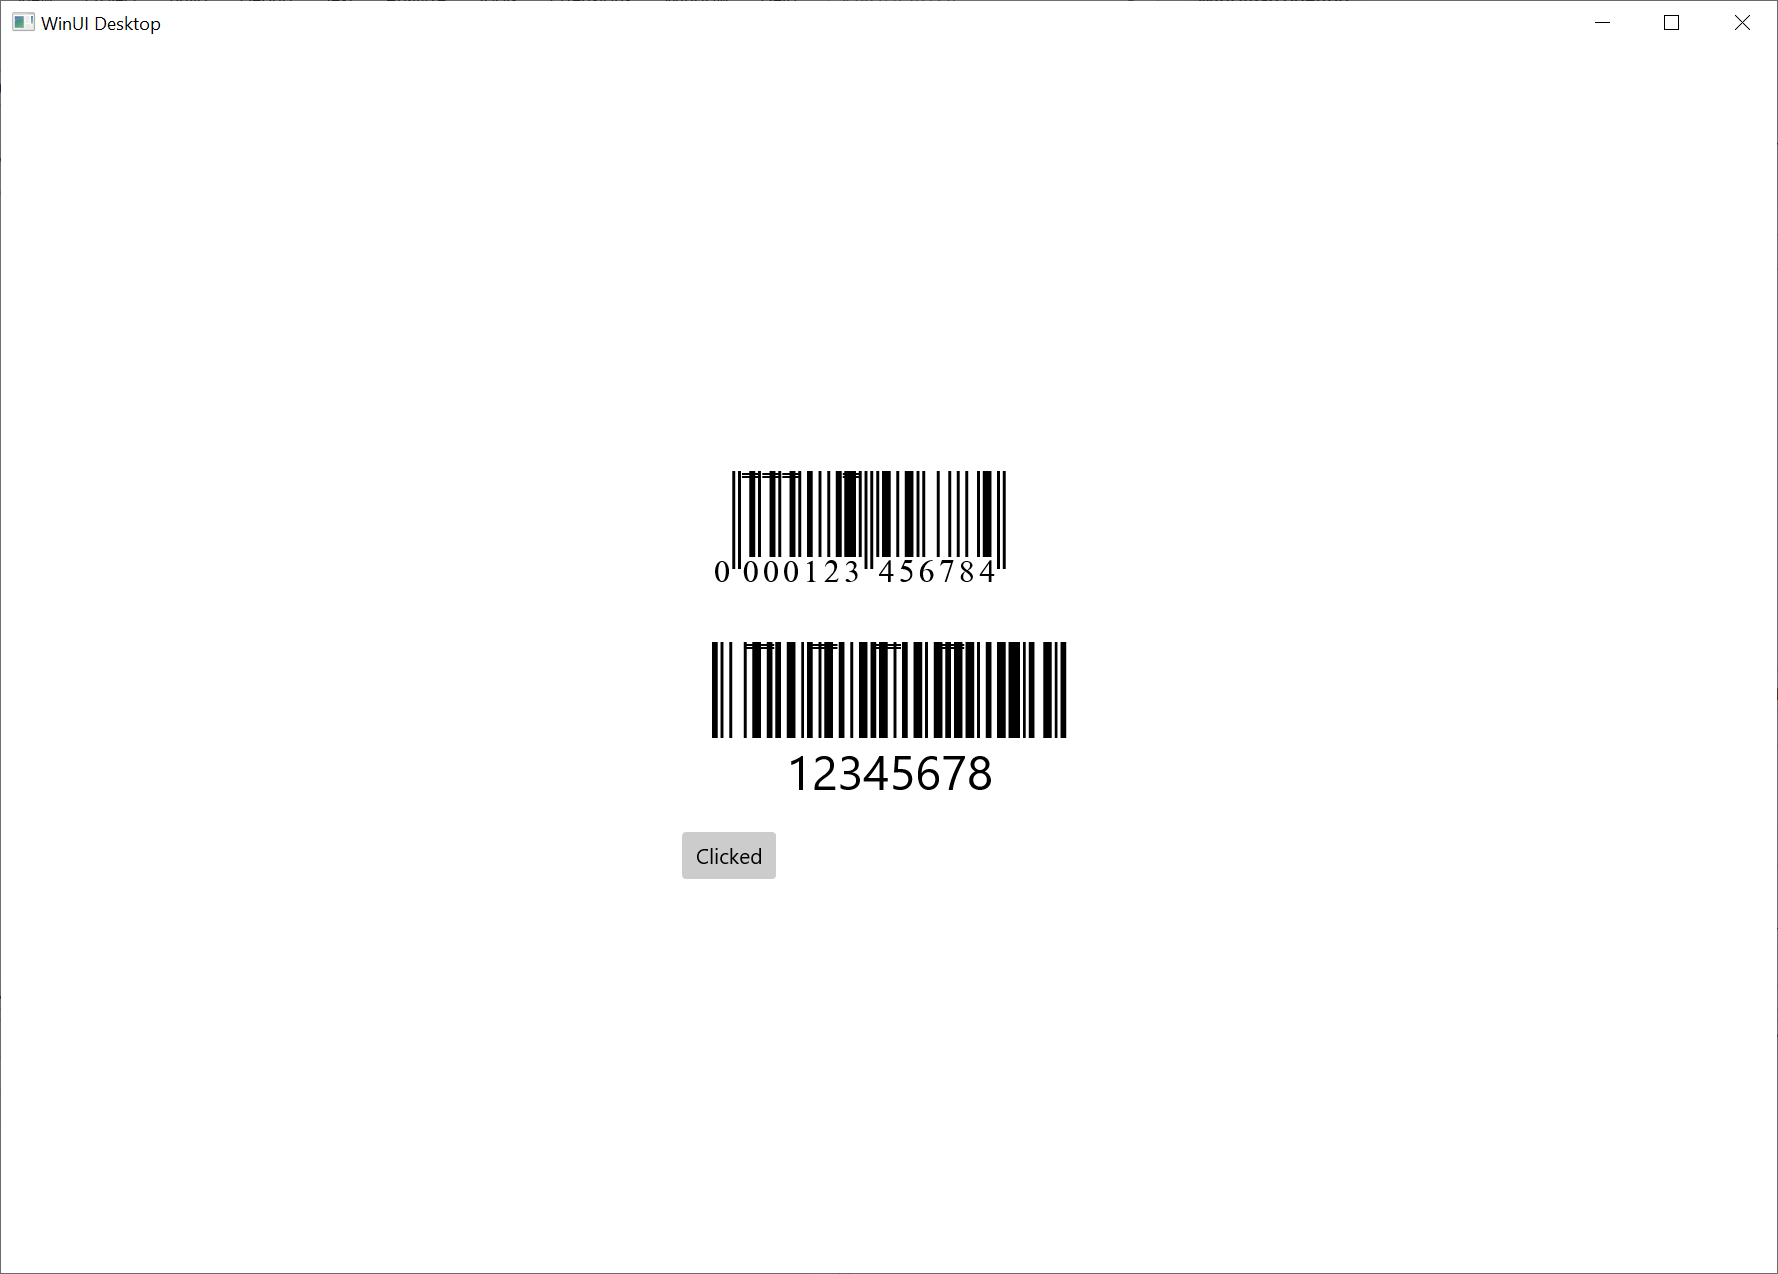
The Code 128 barcode font does not include the Human Readable Text that is usually found below a barcode. For this purpose, we have added a TextBlock and used the following code in myButton_Click to set it up.
Text128.Text = bcf.HumanText;
There are many other types of barcodes such as GS1 128, ITF14, I2of5, UPCA, Code 39 that are supported. Please refer to the link below for information on all supported barcodes, their parameters of the API, and their barcode fonts.
